Repairing Your Garden Hose
While the garden hose is one of the most common homeowner tools, it often gets neglected. The best way to maintain your hose is to take good care of it, by bringing it indoors during the winter so it doesn’t experience the freeze-thaw cycle and weather the elements. Also, drain it and clean the threads. However, even despite some maintenance best efforts, hoses do eventually spring leaks. Luckily, they are easy to patch. If you are struggling with a leak, here are the steps to patch it yourself.
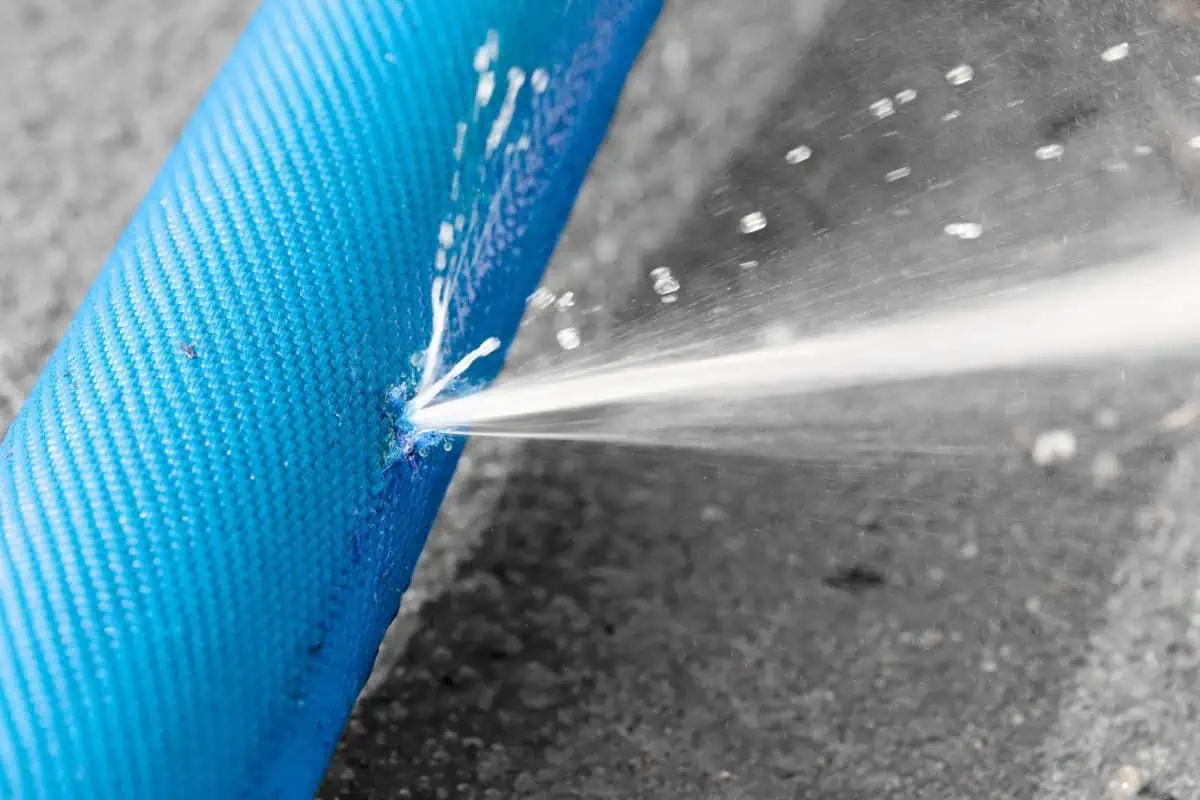
1. Find the location of the leak and mark it
To find the location attach the spray nozzle to the hose and turn on the spigot. This allows the pressure to build up from the nozzle which will make finding the leak easy. Once you find the spot, use a permanent marker to mark the location.
2. Purchase a Repair Kit
Head to your local garden center or hardware store and grab a repair kit. For a leak in the center of the hose, the kit will come with a piece of narrow hose and two clamps. While the kits for leaks on the ends of the hose will include a clamp and threaded fitting. In either case, purchase the kit that best fits your assessment of the leak. Be sure to get the kit that comes with the same material as the hose you are patching as well.
3. Cut the Hose
In the marked location, use a razor knife to cut the hose at the leak. Many leaks tend to occur in heavy wear areas so if the surrounding part is worn cut that as well. It’s important to leave a straight and precise cut so the repair can be done seamlessly.
4. Soak the Hose
Grab a bucket and fill it with hot water, enough to cover the ends of the hose for at least 5 to 6 inches. Also, put some dish soap into the bucket to create a soapy bath of sorts. Then, put the hose into the bucket, and leave it to sit for about 5 minutes. This allows for the hose to warm up and soften.
5. Put on the Clamp
If the leak is in the center, feed each hose end into one of the two clamps. When working on patching at the end, feed the end into the single clamp.
6. Insert Repair Piece and Secure Fittings
Insert the repair piece into each or, the one end. When doing the center repair, be sure to push the repair fitting equally between the cut portion of the hose. Next, move the clamps into place, while covering both sides of the hose, and fitting part inside. Then, tighten up the clamps. For repairing a single end of the hose, do the same steps!
Need Advice on a Home Repair?
We do not offer repair services, but we do know how repairs are done. If you need help with a home repair check out our DIY Section or you can Ask A Contractor and get an expert opinion on your project.